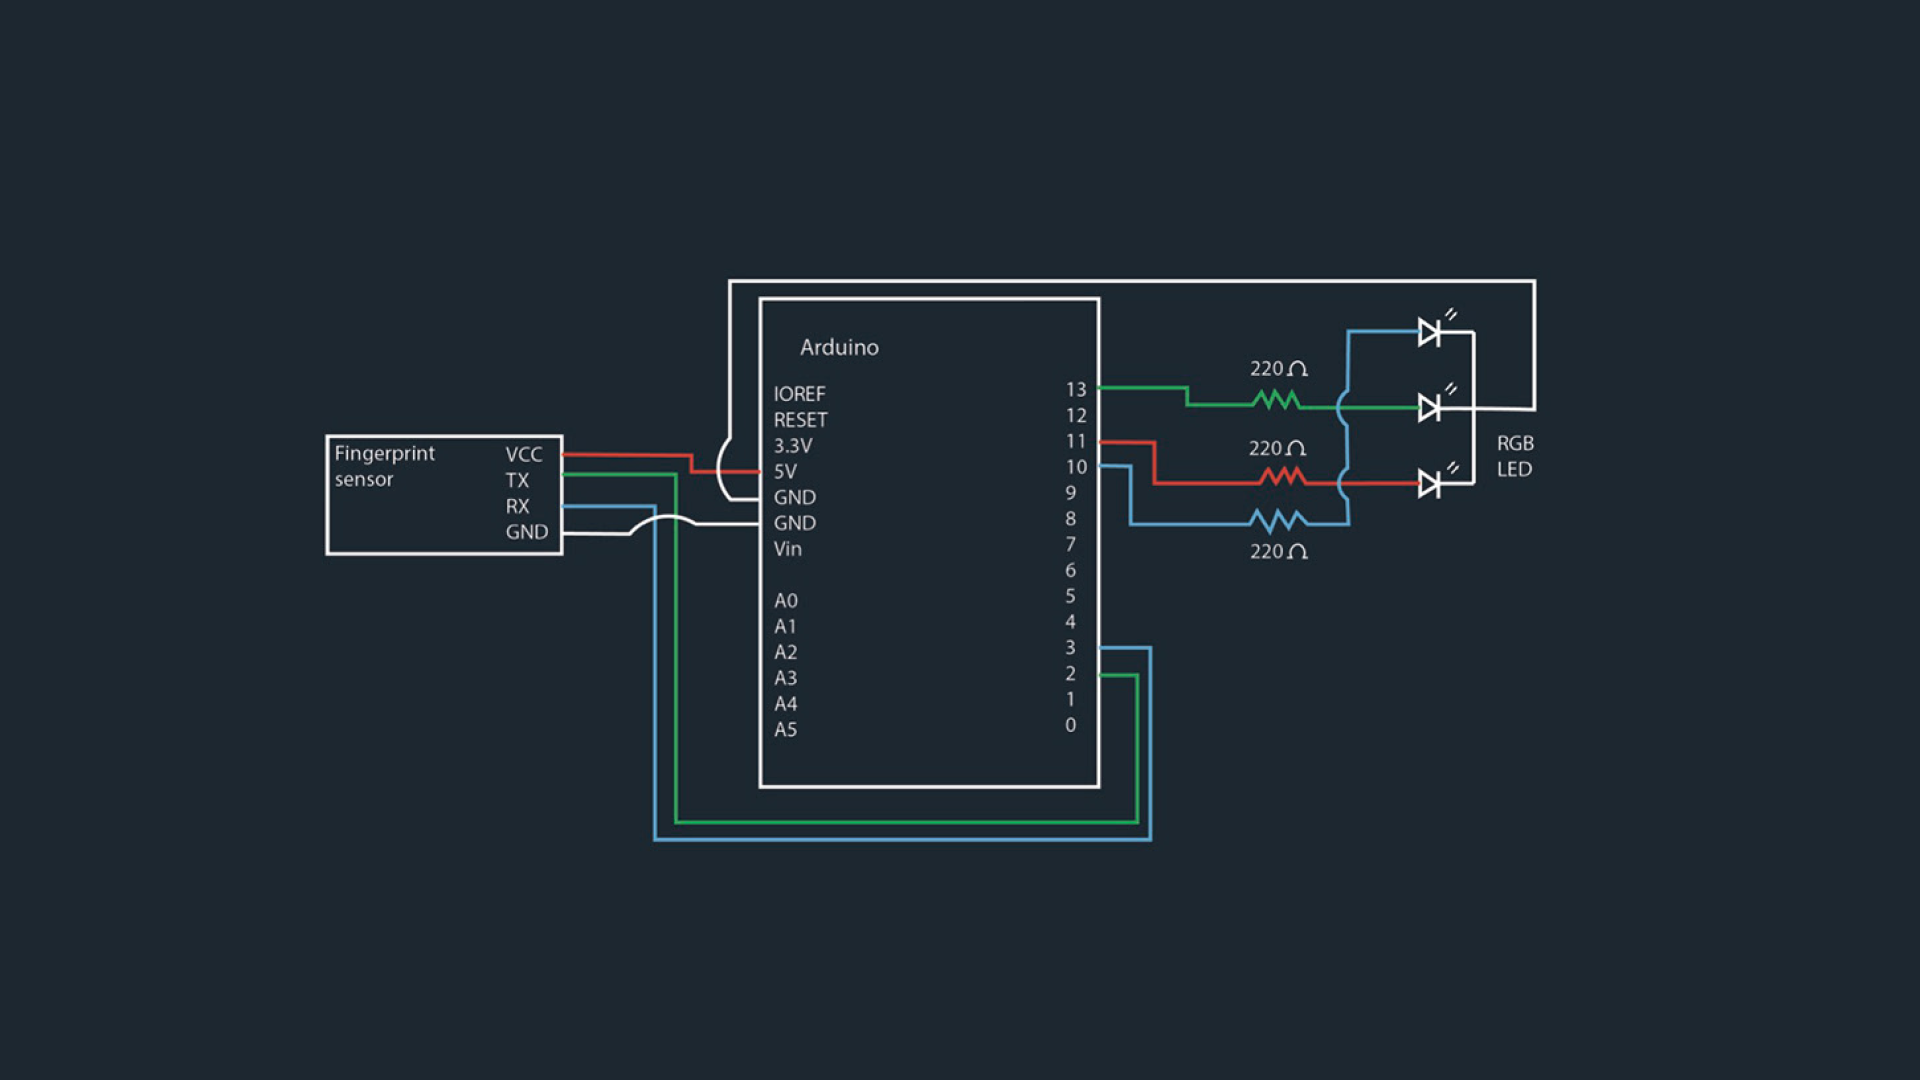
Circuit Diagram
A diagram of the Arduino set-up we initially planned for the final design: depending on whether or not the fingerprint sensor accepts a print, an LED located at the top of the system will light green for approved, red for denied, and blue when on standby. In addition to this set-up, I programmed an interface to guide the customer along their transaction journey.
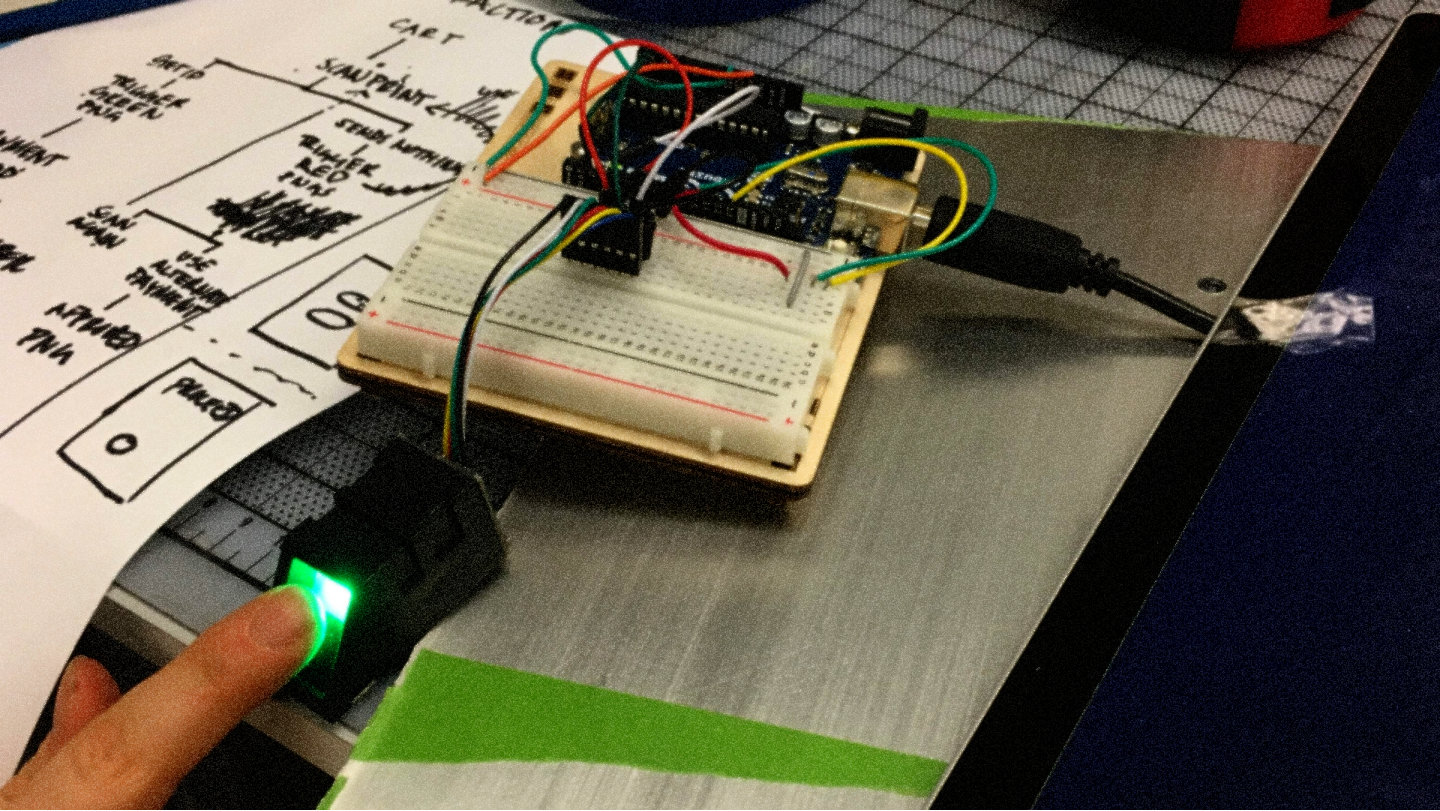
Setting up the Sensor
I first set up the fingerprint sensor prior to putting the hardware into the final casing. This was my first time ever using a fingerprint sensor so it took a bit of time for me to learn how to wire it so it was reading data properly.


.png)


